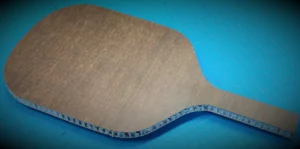
The Cut and Fold Technique using Honeycomb Sandwich Panels
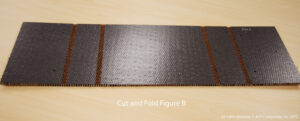
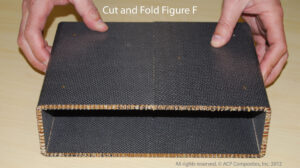
Honeycomb sandwich panels can be constructed to form complex shapes and angles by following the “cut and fold” technique.
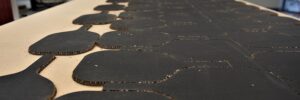
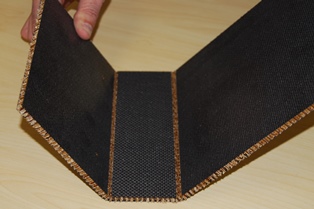
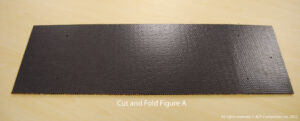
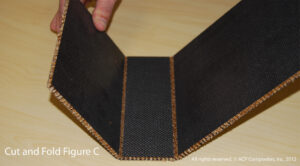
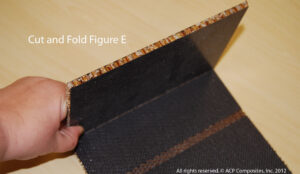
With the “cut and fold” technique, a section of skin is cut away from one side of the honeycomb panel, allowing the panel to be manipulated to create specific angels and a desired structure. A panel that has a woven finished skin is recommended for this technique, as the plain woven outer skin allows the skin to bend with ease.
This method requires minimal use of jigs and fixtures and is a simple, economical solution to creating a strong singular component.
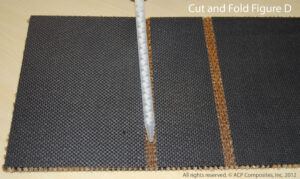
Determining the width of section to remove?
Before cutting the section away from the panel, determine the width of the strip with this calculation. X=Width of the strip to be removed, T= Thickness of the panel, Q°= The degree of angle
X = 2π x T x Q°
360
Example: You have a 1/2” panel and a 90° angle is required.
2π x 1/2″ x 90° 6.28 x .5 x 90 282.60
360 360 360
The strip to be removed would be around .785” wide (.750 would work). It is recommended to create a test fold with the calculation and make adjustments as needed.
PROCEDURE
|       |
KEVLAR® are registered trademarks or trademarks of E.I. du Pont de Nemours and Company and are used with permission.