 Prepregs are becoming increasingly common in the composite industry due to their ease of use, consistent properties, and high-quality surface finish. Using a prepreg helps to produce consistent parts and takes the worry out of inaccurate measuring, excess resin weight and resin voids in the finished product.
However, most prepregs are generally used by fabricators because they often require cold storage and a combination of pressure and heat to fully cure. Learn more about prepregs here. But not having a freezer or a way to cure the material shouldn’t limit user from taking advantage of many of the features that a commercial prepreg can deliver. When cost and storage are a disadvantage why not use a Wet Layup Prepreg?
WHAT IS A WET LAYUP PREPREG?
A Wet Layup Prepreg is the best way to create a product that simulates the prepreg material. By impregnating a material with a resin by hand, a pre-impregnated fabric can be created without the additional cost or storage restrictions related to commercial prepregs.
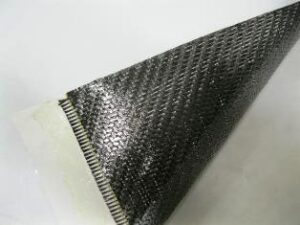
Definition – Layers of composite material that have resin manually impregnated through a wet layup process, is called a Wet Layup Prepreg.
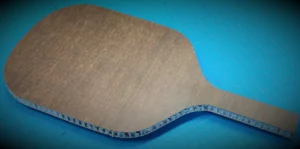
A Wet Layup Prepreg is commonly used when vacuum bagging sandwich panel structures. When using core materials such as honeycomb or aero-mat, the use of a Wet Layup Prepreg lessens the amount of resin that fills the cells. Additionally, shapes and templates can easily be cut from a Wet Layup Prepreg and applied directly to mold surface. Though a more time consuming process, creating a Wet Layup Prepreg results in a lighter weight sandwich structure in the finished product.
CREATE A WET LAYUP PREPREG
- When working with resin, it is important to wear protective gear to prevent inhalation, ingestion, or direct exposure. Make sure to have a face mask, protective eye wear, and gloves accessible and work in a well-ventilated area.
- Begin by laying down a heavy sheet of plastic film, such as Visgueen or our Nylon Vacuum Bagging Film. The thicker the film the better.
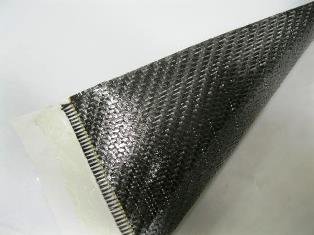
- Layup the fabric reinforcement on top of the plastic film and pour resin over material.
- Be sure to use a resin that has a longer working time. By using a lower viscosity resin like our EZ-Lam or Pro-Set 125 Resin line, the resin with flow through the fabric easily.
- Squeeze out excess resin.
- Place another layer of the plastic film on top of the fabric.;
- Using a drum roller or a rolling pin, apply pressure forcing resin into the fibers while pushing any remaining excess resin.
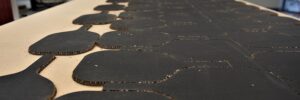
- Keep the plastic film on to cut out templates.
- Remove top layer of plastic film and apply the fabric to mold surface.
- Once in place, remove the other plastic film layer.
- Handle as you would a commercial prepreg from this point onward with respect to vacuum bagging.